Sometimes wildlife only gives you a few seconds to take the shot. If you aren’t prepared, you’ll miss the opportunity. Here are five tips I use to be more prepared for anything. I’m sure there are more than just five, so share your own tips in the comment section below!
1. KEEP YOUR CAMERA CLOSE
Being fully prepared to grab your camera and start shoot at any time will ensure you get shots that you might otherwise miss completely. While driving by myself, I’ll always have my camera on and ready to go in the passenger seat, or at least as close as possible. You don’t want to have to get out of your car, if at all possible.
I encourage my workshop clients to keep at least one camera with a telephoto lens in their lap, ready at all times. There simply might not be enough time to get your camera out of a bag, put a lens on, and set it up on the tripod before the animal is long gone.
2. HAVE YOUR EXPOSURE SET
By learning to judge the amount of light coming down from the sky in different situations, I can quickly adjust all three settings to get a good exposure without taking a single shot. I almost always make sure these settings are dialed in before driving around to look for wildlife. Another option is to set your camera in aperture priority mode with the widest aperture possible. This puts the other settings on auto so you won’t miss a shot.
After first getting some solid keeper shots, then I can start experiementing with changing settings (if there’s even time). If you’re fumbling around with settings when you find wildlife, you’ll miss the shot.
It doesn’t matter if you’re using aperture priority, shutter priority, or manual mode. As long as you understand how each one works, you can get a good exposure. Some lighting scenarios will see better results from controlling the exposure in full manual mode, especially backlighting. The automatic settings won’t expose correctly for either highlights or shadows, it will give an exposure somewhere in the middle.
[sciba leftsrc=”https://trentsizemore.com/blog/wp-content/uploads/2017/07/20160508_Montana_4552-3.jpg” leftlabel=”As shot” rightsrc=”https://trentsizemore.com/blog/wp-content/uploads/2017/07/20160508_Montana_4552-4.jpg” rightlabel=”Processed” mode=”horizontal” width=””]
Above: ISO 1250 – f/5.6 – 1/640s (Av mode -1 EV). Even at -1 exposure compensation, this image is still showing bright highlights.” I processed it by dropping the exposure even further to recover color in the highlights.
3. LEAVE THE TRIPOD
Unless you’re sitting in one spot and waiting for wildlife to come to you, a tripod is very restricting to quick camera movements. My tripod weighs just as much as my camera setup (10+ pounds each) but takes up much more room when full extended. Trying to carry around both when I need to quickly move to a new spot is cumbersome. Unless you’re using a really slow shutter speed, it’s unnecessary.
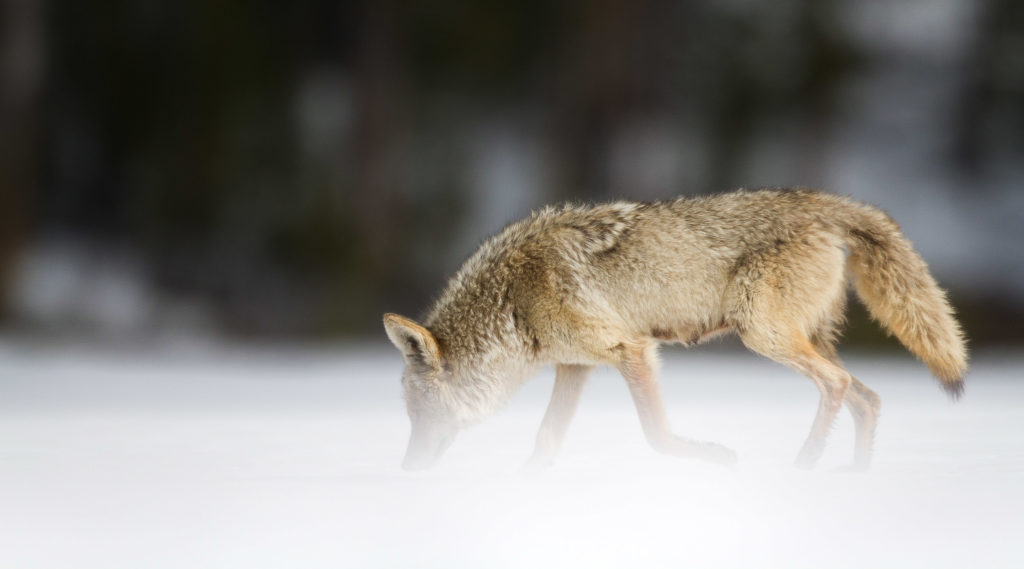
A tripod also restricts you to one perspective. You can change the height, but it’s going to take extra time and effort to do so. For super low angle shots, a tripod just gets in the way and prevents you from being completely at ground level (see coyote example below).

4. KNOW YOUR SUBJECT
By studying your subject beforehand, and having experience in the field, you will have a better idea of its behavior. You’ll know whether an animal is stressed or not. You’ll know when it’s going to get up, leave, walk, etc. For example, almost every time a mother grizzly bear stands up for a better look at something, you can bet the cubs will follow suit.
Besides behavior, just doing some quick research on the places animals are typically seen goes a long way to making your wildlife outing more fruitful. In Yellowstone, there are certain areas that are more wildlife rich than others. If you want to increase your chances of spotting something, you’ll go there first. Combining knowledge and preparation with a little bit of luck will get you consistent wildlife sightings.
5. PRACTICE
When you practice in the backyard, a park, a zoo, or anywhere else, you learn your camera to the point that it becomes second nature. You can find a dog or something that will run around, and practice using the continuous focus mode. Practice changing focal points without taking your eye away from the viewfinder. A tip from my friend Tin Man Lee is to master bird-in-flight photography. If you can do that successfully, you’ll be able to master photographing moving wildlife as well.

P.S. Whenever you’re ready, here are a couple of ways I can help you improve your photography.
1. Download my free wildlife photography eBook
Five quick, easy tips that you can start using right away to improve your wildlife photography — Click Here
2. Join a photography workshop in Yellowstone
Improve your photography with hands on instruction in an environment rich with opportunities for both wildlife and landscape photography — Click Here


I keep the camera on my car seat and have trained myself to TAKE THE LENSCAP OFF.
I make sure both my in-camera and spare battery are charged. I also consider where I’m going. If I’m flying to a destination or, if I’m going to be doing some excessive hiking, I choose my tripod accordingly.
I always make sure that my battery is charged. I had to learn that one the hard way! 😉